特徴量の異なる2つの予測モデルのABテスト環境を、SageMaeker推論エンドポイントを用いて作ってみます。
本文中のコードです github.com
目次
データ・モデル
データ
- kaggle の avazu-ctr-predictionのデータセット
- Click-Through Rate Prediction | Kaggle
モデル
- 特徴量をFeature Hasing した、線形分類モデル
- 広告をクリックする確率(CTR)を予測する二値分類モデル
- ABテスト用に二つの特徴量の組み合わせのモデルを用意
modelA
feature_names = {
    0: "id",
    1: "hour",
    2: "C1",
    3: "banner_pos",
    4: "site_id",
    5: "site_domain",
    6: "site_category",
    7: "app_id",
    8: "app_domain",
    9: "app_category",
    10: "device_id",
    11: "device_ip",
    12: "device_model",
    13: "device_type",
    14: "device_conn_type",
}
modelB
feature_names = {
    0: "id",
    1: "hour",
    2: "C1",
    3: "banner_pos",
    4: "site_id",
    5: "site_domain",
    6: "site_category",
    7: "app_id",
    8: "app_domain",
    9: "app_category",
    10: "device_id",
    11: "device_ip",
    12: "device_model",
    13: "device_type",
    14: "device_conn_type",
    15: "C14",
    16: "C15",
    17: "C16",
    18: "C17",
    19: "C18",
    20: "C19",
    21: "C20",
    22: "C21",
}
学習
データ準備
以下は、jupyter notebook で実行するコードです。 AWSリソースの設定の読み込みを行います
import yaml
import sagemaker
import boto3
import json

SETTING_FILE_PATH = "../config/settings.yaml"
DATA_FOLDER_PATH = "../avazu-ctr-prediction"

# AWS リソース設定
with open(SETTING_FILE_PATH) as file:
    aws_info = yaml.safe_load(file)

sess = sagemaker.Session()
role = aws_info['aws']['sagemaker']['role']
bucket = aws_info['aws']['sagemaker']['s3bucket']
region = aws_info['aws']['sagemaker']['region']

sm = boto3.client('sagemaker')
s3 = boto3.client('s3')
学習データを読み込み、訓練・テストデータにデータ分割します
import os
import pandas as pd

from sklearn.model_selection import train_test_split

# train, validation, test データを用意
df_train = pd.read_csv(os.path.join(DATA_FOLDER_PATH, "train"), dtype="object")
df_train, df_test = train_test_split(df_train, train_size=0.8, random_state=0, shuffle=True)
SageMaker学習ジョブにデータを渡すため、S3にデータを保存します
# S3にアップロード
prefix = 'sagemaker-ab-testing'

train_file = "train.csv"
test_file = "test.csv"

df_train.to_csv(train_file, index=False)
df_test.to_csv(test_file, index=False)

s3_resource_bucket = boto3.Session().resource("s3").Bucket(bucket)

s3_resource_bucket.Object(os.path.join(prefix, "train", train_file)).upload_file(train_file)
s3_resource_bucket.Object(os.path.join(prefix, "test", test_file)).upload_file(test_file)
S3にデータが保存されているのを確認できます

学習スクリプト
SageMaker のScitkit-Learnの環境が用意された公式コンテナで、独自の学習スクリプトを実行する方法で学習ジョブを実行します。
SageMaker学習ジョブで独自スクリプトを実行する詳しい内容はこちらの記事で紹介してます
SageMaker で学習ジョブを実行する ~独自スクリプト~ - nsakki55 のアウトプットブログ
コマンドライン引数からハイパーパラメータ・学習データパスを渡し、学習モデルを保存する train.pyを用意します。
以下はmodelAのtrain.pyです。modelBのtrain.pyは、feature_namesが異なるだけで、その他の処理内容は同じです。
import argparse
import os

import joblib
import numpy as np
import pandas as pd
from sagemaker_training import environment
from sklearn.feature_extraction import FeatureHasher
from sklearn.linear_model import SGDClassifier

feature_names = {
    0: "id",
    1: "hour",
    2: "C1",
    3: "banner_pos",
    4: "site_id",
    5: "site_domain",
    6: "site_category",
    7: "app_id",
    8: "app_domain",
    9: "app_category",
    10: "device_id",
    11: "device_ip",
    12: "device_model",
    13: "device_type",
    14: "device_conn_type",
}


target = "click"


def parse_args():
    env = environment.Environment()

    parser = argparse.ArgumentParser()

    # hyperparameters sent by the client are passed as command-line arguments to the script
    parser.add_argument("--alpha", type=float, default=0.00001)
    parser.add_argument("--n-jobs", type=int, default=env.num_cpus)
    parser.add_argument("--eta0", type=float, default=2.0)

    # data directories
    parser.add_argument("--train", type=str, default=os.environ.get("SM_CHANNEL_TRAIN"))
    parser.add_argument("--test", type=str, default=os.environ.get("SM_CHANNEL_TEST"))

    # model directory: we will use the default set by SageMaker, /opt/ml/model
    parser.add_argument("--model_dir", type=str, default=os.environ.get("SM_MODEL_DIR"))

    return parser.parse_known_args()


def load_dataset(path):
    # Take the set of files and read them all into a single pandas dataframe
    files = [os.path.join(path, file) for file in os.listdir(path) if file.endswith("csv")]

    if len(files) == 0:
        raise ValueError("Invalid # of files in dir: {}".format(path))

    raw_data = [pd.read_csv(file, sep=",") for file in files]
    data = pd.concat(raw_data)

    y = data[target]
    X = data.drop(target, axis=1)
    return X, y


def preprocess(df):
    feature_hasher = FeatureHasher(n_features=2**24, input_type="string")
    hashed_feature = feature_hasher.fit_transform(np.asanyarray(df[[col for col in feature_names.values()]].astype(str)))
    return hashed_feature


def main(args):
    print("Training mode")

    X_train, y_train = load_dataset(args.train)
    X_test, y_test = load_dataset(args.test)

    y_train = np.asarray(y_train).ravel()
    X_train_hashed = preprocess(X_train)

    y_test = np.asarray(y_test).ravel()
    X_test_hashed = preprocess(X_test)

    hyperparameters = {
        "alpha": args.alpha,
        "n_jobs": args.n_jobs,
        "eta0": args.eta0,
    }
    print("Training the classifier")
    model = SGDClassifier(loss="log", penalty="l2", random_state=42, **hyperparameters)

    model.partial_fit(X_train_hashed, y_train, classes=[0, 1])

    print("Score: {}".format(model.score(X_test_hashed, y_test)))
    joblib.dump(model, os.path.join(args.model_dir, "model.joblib"))


if __name__ == "__main__":
    args, _ = parse_args()
    main(args)
学習ジョブの実行
ab_test_deploy.ipynb を作成し、独自スクリプトの学習ジョブを実行します。
Scikit-Learn環境を利用するため、SKLearn Estimator クラスを使用します。
source_dirに学習スクリプトがあるディレクトリ、entry_pointに学習スクリプト名を指定します
以下のフォルダ構成で実行します
src
 ├── ab_test_deploy.ipynb
 │
 ├── modelA
 │     │
 │     └── train.py
 │
 └── modelB
       │
       └── train.py
modelAの学習ジョブを実行します。modelBの学習ジョブの実行はsource_dirを変更すればOKです。
from time import gmtime, strftime

from sagemaker.sklearn.estimator import SKLearn

job_name = "modelA-training-job" + strftime("%Y%m%d-%H-%M-%S", gmtime())

hyperparameters = {"alpha": 0.00001, "eta0": 2.0}
enable_local_mode_training = False

if enable_local_mode_training:
    train_instance_type = "local"
    inputs = {"train": f"file://{train_file}", "test": f"file://{test_file}"}
else:
    train_instance_type = "ml.m5.large"
    inputs = {"train": s3_train_data, "test": s3_test_data}

estimator_parameters = {
    "entry_point": "train.py",
    "source_dir": "modelA",
    "framework_version": "0.23-1",
    "py_version": "py3",
    "instance_type": train_instance_type,
    "instance_count": 1,
    "hyperparameters": hyperparameters,
    "output_path": output_location,
    "role": role,
    "base_job_name": job_name,
}

model_a_estimator = SKLearn(**estimator_parameters)
model_a_estimator.fit(inputs)
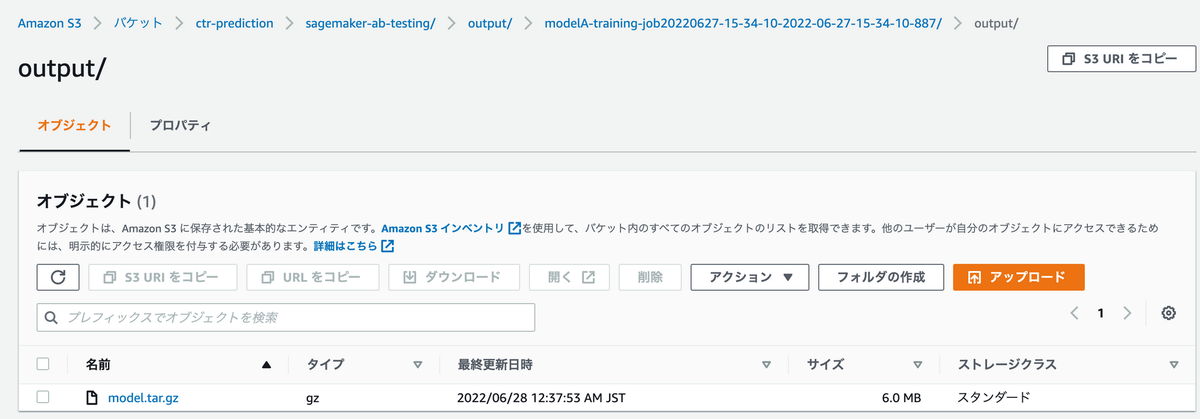
学習ジョブが実行されて、S3に学習済みモデルが保存されていることを確認できます

モデル登録
推論スクリプト
AWSが提供する公式コンテナ環境で独自の推論スクリプトを実行します。
公式コンテナ環境にはsagemkaker-inference-toolkit がインストールされていて、ツールキットの使用に合わせて、独自推論スクリプトを実行するには以下の関数を記述する必要があります
- model_fn: 学習済みモデルの読み込み処理
- input_fn: リクエストデータをモデルに渡すデータに変換する処理
- predict_fn: モデルから予測値を取得する処理
- output_fn : predict_fnの予測値をレスポンスとして返すための処理
記事の本題からズレるので、詳しい説明は以下の記事でご確認ください。
独自の推論コンテナを適応させる - Amazon SageMaker
Deploying A Pre-Trained Sklearn Model on Amazon SageMaker | by Ram Vegiraju | Towards Data Science
modelAの推論処理を記述したinference.pyを用意します。modelB用の推論処理はfeature_namesが変更されるだけで、他は同じ処理内容です。
import os
from io import StringIO

import joblib
import numpy as np
import pandas as pd
from sklearn.feature_extraction import FeatureHasher

feature_names = {
    0: "id",
    1: "hour",
    2: "C1",
    3: "banner_pos",
    4: "site_id",
    5: "site_domain",
    6: "site_category",
    7: "app_id",
    8: "app_domain",
    9: "app_category",
    10: "device_id",
    11: "device_ip",
    12: "device_model",
    13: "device_type",
    14: "device_conn_type",
}


def preprocess(df: pd.DataFrame):
    feature_hasher = FeatureHasher(n_features=2**24, input_type="string")
    hashed_feature = feature_hasher.fit_transform(np.asanyarray(df[[idx for idx in feature_names.keys()]].astype(str)))
    return hashed_feature


def model_fn(model_dir):
    """
    Deserialize fitted model
    """
    model = joblib.load(os.path.join(model_dir, "model.joblib"))
    return model


def input_fn(request_body, request_content_type):
    """
    request_body: The body of the request sent to the model.
    request_content_type: (string) specifies the format/variable type of the request
    """
    if request_content_type == "text/csv":
        # Read the raw input data as CSV.
        df_input = pd.read_csv(StringIO(request_body), header=None)
        input_data_hashed = preprocess(df_input)
        return input_data_hashed
    else:
        raise ValueError("This model only supports text/csv input")


def predict_fn(input_data, model):
    """
    input_data: returned array from input_fn above
    model (sklearn model) returned model loaded from model_fn above
    """

    return model.predict_proba(input_data)


def output_fn(prediction, content_type):
    """
    prediction: the returned value from predict_fn above
    content_type: the content type the endpoint expects to be returned. Ex: JSON, string
    """

    response = {"result": [{"prediction": prediction[0][1], "model": "modelA"}]}
    return response
モデル登録
ab_test_deploy.ipynbからエンドポイントに使用するためのモデル登録を行います。
AWS提供のScikit-Learn環境で、独自推論スクリプトを実行するモデルを登録するため、SKLearnModelクラスを使用します。
model_data引数には先程の学習ジョブで保存されたモデルのS3 uriを指定します。
source_dir には推論スクリプトのディレクトリ、entri_pointには推論スクリプト名を渡します。
sagemaker session のcreate_modelメソッドでモデルの登録を行います。
モデル登録にはこの方法以外に
- sagemkaer session のcreate_model_from_job
- boto3 のsagemaker client のmodel_create
の方法がありますが、自分が試したところ、上記二つの方法で登録したモデルでは独自推論処理のエンドポイントが立てられませんでした。うーん、SageMaker 難しい…
以下のフォルダ構成で実行します
src
 ├── ab_test_deploy.ipynb
 │
 ├── modelA
 │     │
 │     └── inference.py
 │
 └── modelB
       │
       └── inference..py
import sagemaker
from sagemaker.sklearn.model import SKLearnModel

sess = sagemaker.Session()

modelA = SKLearnModel(
    role=role,
    model_data=model_a_estimator.model_data,
    framework_version="0.23-1",
    py_version="py3",
    source_dir="modelA",
    entry_point="inference.py",
    sagemaker_session=sess
)

model_a_name = "{}-{}".format("modelA", timestamp)

# モデル登録
sess.create_model(
    model_a_name,
    role,
    modelA.prepare_container_def(
        instance_type='ml.t2.medium'
    )
)
モデルが登録されていることを確認できます。

推論エンドポイント作成
バケット振り分け設定
1つの推論エンドポイントにmodelA, modelBの2つの予測モデルをデプロイし、エンドポイント設定でリクエストのトラフィックを分配することでABテストを実現できます。

initial_weightが割り当て比率になり、50に設定します。
作成したproduction_variantを元に、create_endpoint_configでエンドポイントの設定を作成します。
from sagemaker.session import production_variant
import time

timestamp = "{}".format(int(time.time()))
endpoint_config_name = "{}-{}".format("abtest", timestamp)

modelA_variant = production_variant(
    model_name=model_a_name,
    instance_type="ml.t2.medium",
    initial_instance_count=1,
    variant_name="VariantA",
    initial_weight=50,
)

modelB_variant = production_variant(
    model_name=model_b_name,
    instance_type="ml.t2.medium",
    initial_instance_count=1,
    variant_name="VariantB",
    initial_weight=50,
)

# 推論エンドポイント設定
endpoint_config = sm.create_endpoint_config(
    EndpointConfigName=endpoint_config_name, ProductionVariants=[modelA_variant, modelB_variant]
)
エンドポイント設定が作成されていることを確認できます

推論エンドポイント作成
create_endpointに設定を渡すことで、任意の割り当て比率の推論エンドポイントを作成できます。
model_ab_endpoint_name = "{}-{}".format("abtest", timestamp)

# 推論エンドポイント作成
endpoint_response = sm.create_endpoint(EndpointName=model_ab_endpoint_name, EndpointConfigName=endpoint_config_name)
バケット振り分けをしたエンドポイント設定を元に、推論エンドポイントが作成されていることを確認できます。


リクエスト
boot3のsagemaker-runtime clientで推論エンドポイントにリクエストを送ります。 適切に2つのモデルにリクエストが振り分けられ、ABテストになっているか確認します。
runtime = boto3.Session().client('sagemaker-runtime')
model_list = []
prediction_list = []

with open('test.csv') as f:
    for line in f:
        response = runtime.invoke_endpoint(EndpointName=model_ab_endpoint_name,
                                   ContentType='text/csv',
                                   Body=line,
                                  Accept='application/json')
        df_pred = pd.read_csv(response['Body'], header=None, delimiter='\t')
        model = json.loads(df_pred[0][0])['result'][0]['model']
        prediction = json.loads(df_pred[0][0])['result'][0]['prediction']
        model_list.append(model)
        prediction_list.append(prediction)
リクエストの振り分けを確認すると、ほぼ50:50の割り当て比率であることを確認できます。
print("[modelA] response:{}, bucket: {}".format(model_list.count('modelA'), model_list.count('modelA') / len(model_list)))
print("[modelB] response:{}, bucket: {}".format(model_list.count('modelB'), model_list.count('modelB') / len(model_list)))

# 出力
#[modelA] response:5073, bucket: 0.5073
#[modelB] response:4927, bucket: 0.4927
まとめ
SageMaker Endpoint を用いてABテスト環境を作成しました。 注意点として、SageMakerがTrafficをランダムに複数モデルに割り当てるため、リクエストベースでのABテストとなります。ユーザーベースなど、任意のセグメントでバケットを振り分けたい場合、クライアント側でリクエストの割り振りを行う必要があります。